abraham
Back to ChroniclesMt. Abraham Union High School's Applied Architecture II Class
Studies Covered Bridges
Paul Stetson, Instructor
The Assignment- Working in groups of three, build a 1:24 scale model of a covered bridge in our area.
Kate Pellegrini, Applied Architecture II - Shelburne Museum Bridge - The bridge
project was very interesting and integrated building the bridge in the
woodshop with finding mathematical formulae, drawing and constructing a "to-scale" model. The
process began back in September with a 'Vermont Covered Bridges" field trip.
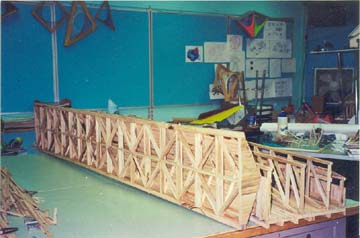
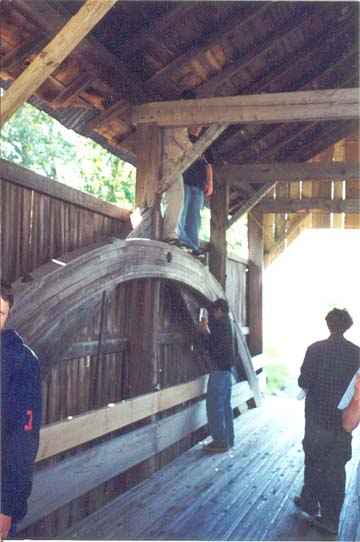
Shelburne Museum Bridge's top section (on side)
resting against the rest of the model bridge →
When we returned to school, the project was continued by deriving a formula of 1':2". Every measured chord and beam was adjusted to scale and those were the measurements that we would use for the building of the bridge.
The Shelburne Museum bridge was a two lane bridge with a gate and a covered walkway. We created several drawings of the bridge. They included a portal (opening) view, views of the floor, ceiling truss, and side arches from the point of inside the bridge. We also had a side view, top and bottom view from standing outside of the bridge. The drawings were drawn to the same scale as the model so that the width and length of different pieces would be the exact, length and width as the pieces of wood for the model we're building. (This was convenient for this way, materials could be laid right on top of the blueprints.)
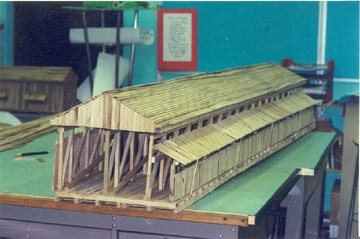
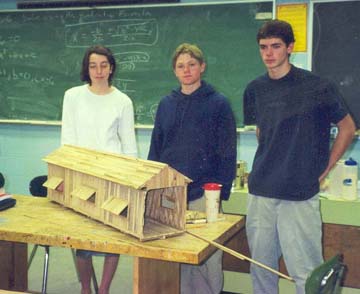
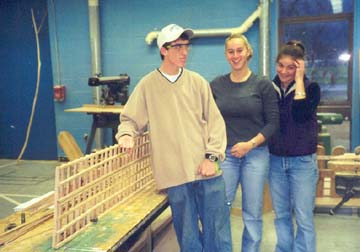
Finished Shelburne Museum Bridge build by Lindsay Spaulding,
Kate Pellegrini, and Darin Griner at a scale of 1:24 →
We used many techniques to build the bridges and the bridge was constructed in multiple kingpost with a burr arch. It's finally done and it was a great project. Ω
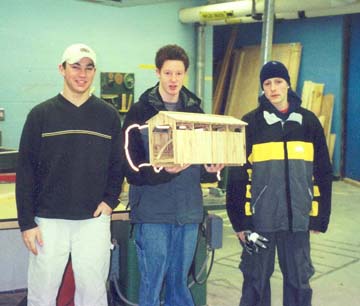
Lake Shore Bridge built by Zach Laurie,
Levi Lindblad, and Leon Saourn →
Lindsay Spaulding - When we started this project, we took a field trip to the
Charlotte area and took measurements of all the bridges and made sketches. After we compiled all
ofour measurements and sketches, we selected a bridge to build.
Our "lucky" group got stuck with the
Shelburne Museum bridge, one of the only double lane bridges in the state. In addition to the
double lanes, our bridge also had a walking path.
Once back at school, we drew several
drawings of our bridge in the scale that was decided. We drew side, front, and underneath views.
We also had to draw the truss looking at it from the inside and a view looking up at the supports
in the ceiling sections.
When we started the construction of our
bridge, we first made the floor level. We followed the same patterns that other groups used
because we couldn't get underneath the bridge to view the structure. Next, we made the ceiling
section. I started on the floor boards, nailing each strip of wood to the floor structure. Kate
worked on the roof trusses, while Darin began the four main trusses. We all switched back and
forth and worked on different jobs.
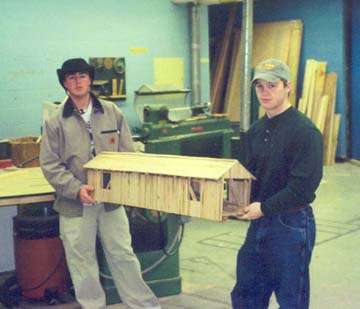 Quinlan Bridge built by Tyson Rotax,
Curtis Layn, and Mark Holbrook →
It's hard to say that I only worked on one section of our bridge, because we all worked on different sections. I nailed the floor boarding, made two of the four trusses, and finished the shingles. I also worked with Kate on the entire roof structure. This project was very interesting. I enjoyed building one of the LARGEST bridges in Vermont, even though at times it was very frustrating. [This was part of their final exam. They had to tell me what they did in the building process - Paul Stetson]
Lindsay Spaulding (continued) - The covered bridge project that my Applied
Architecture 2 class worked on was very time consuming, but also interesting. In the fall, our
class went out on a trip to five local covered bridges. We measured and wrote down the
dimensions of the different parts of the bridge. Once back at school we drew a series of five
drawings to follow when we began the construction process.

Sequin Bridge built by Andrew Thibault,
Graham Huber, and Marcus Denice →
This project was one that I'll never forget. To spend an entire semester building a covered bridge was truly amazing. The finished project is something I'll keep for a lifetime. There's more to covered bridges than just wood. Ω
Covered Bridge Project Review By Heidi Neil - The covered bridge
project was good. I didn't like the fact that we had to do drawings, thought they took too much
time. I liked actually working on the bridges, although they took a lot of time.
Spade Farm Bridge build by Heidi Neil,
Chris Gale, and Dan Quiet. →
A Word From Instructor Paul Stetson - The Applied Architecture courses at Mt.
Abraham use a "hands- on" approach to study the field of Architecture. In Applied Architecture I,
students complete units on: Geometric Shapes in Buildings, a study of famous architects including
Frank Lloyd Wright and Louis Sullivan, designing a Dream House, designing a Mouse House,
Structures, Roller Coasters, interior design, and Tree Houses. Students felt there was a need for a
second level of the course so they approached me to develop one.
Construction of the Sequin Bridge. →
This is the first year the Applied Architecture II class is being offered. I have always had an interest in the design and history of covered bridges and felt this would be a good topic to explore. I also wanted to combine drawing and design work with the actual building of scale models.
The Covered Bridge unit began with a discussion of the essential questions: Why were bridges covered? What is the Vermont folklore about covered bridges? How are covered bridges built? How many covered bridges are left in Vermont?. Along with the class discussions, students also searched the Internet to find answers to these questions.
We next discussed the vocabulary related to covered bridges. This included names of building members and tools used. We also studied the different truss systems used in the bridges. Many thanks to Joe Nelson and Ed Barna for the information they included in their books on covered bridges.
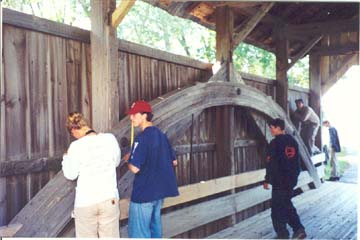
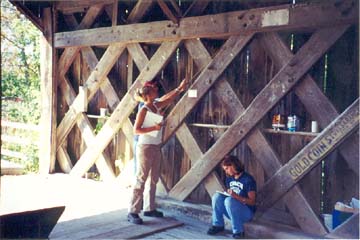
 In early September we took an all day
field trip to the five covered bridges in the Shelburne, Charlotte, Ferrisburg area. Students were
divided into groups of three and were given tape measures and paper. They proceeded to sketch
and measure each building member in the five bridges we visited. On the way back to school we
had a drawing to see which group would build which bridge.
In early September we took an all day
field trip to the five covered bridges in the Shelburne, Charlotte, Ferrisburg area. Students were
divided into groups of three and were given tape measures and paper. They proceeded to sketch
and measure each building member in the five bridges we visited. On the way back to school we
had a drawing to see which group would build which bridge.The next few class periods (80 minute blocks), students worked on a set of drawings for their bridge. Using a scale of 1:24, they drew the floor system from underneath the bridge, the truss used to support the bridge drawn from inside the bridge, the exterior side of the bridge, the portal opening, and the ceiling framework drawn looking up while standing on the bridge.
Once the drawings were complete, we moved the class to the woodshop and began the construction of the bridges. Students were taught the safety rules of the shop and how to operate the machines. They wanted to make the models as authentic as possible so they pinned many of the pieces together using small dowels.
The students deserve a lot of credit for working through problems in construction. Through this unit, they learned the history and construction techniques of building covered bridges. Many students commented on how hard it must have been to build these bridges at full scale. They also learned to work together as a team to create some very impressive models. Ω
and Spade Farm bridge (above right)
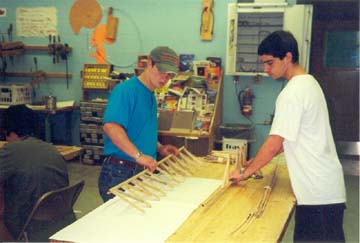
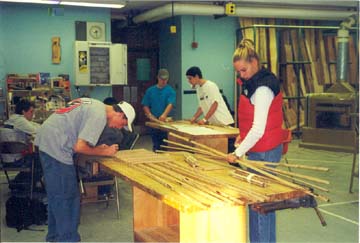
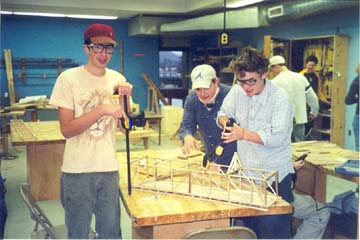
Students begin the process of building scale models of five
Vermont Covered Bridges using a scale of 1:24 (above and left).
 Joe Nelson, P.O Box 267, Jericho, VT 05465-0267, jcnelson@together.net
No part of this web site may be reproduced without the written permission of Joseph C.
Nelson
Copyright © 2001, Paul Stetson
This file posted April 3, 2001